
Content
The Pre-Storage Purge: Less is More
Before a single item goes into a bin, it’s time for a ruthless decluttering session. It’s the least glamorous step, but arguably the most important. As you take down your decorations, inspect each one with a critical eye. Is that string of lights only half-working? Are those ornaments chipped or simply no longer your style? Did that inflatable snowman spring a leak? There is absolutely no reason to waste precious storage space on items that are broken, outdated, or no longer bring you joy. Create three piles: Keep, Donate, and Trash. Be honest with yourself. If you haven’t used a particular item in the last two holiday seasons, it’s probably time to let it go. This single step will reduce the volume of stuff you need to store and ensure that next year, you’re only unboxing items you truly love and want to display.Categorize for a Foolproof Setup
The golden rule of efficient holiday storage is to pack with future unpacking in mind. Instead of throwing everything randomly into bins labeled “Christmas,” think about how you decorate. The most effective method is to store items by room or “zone.” Create dedicated boxes for the living room mantel, the front porch display, the kitchen decor, and of course, the main Christmas tree. This way, when it’s time to decorate, you can simply grab the “Mantel” box and have everything you need—garland, stocking holders, festive figurines—all in one place. No more frantic searching through a dozen containers for that one specific item. This approach turns decorating into a simple, room-by-room project rather than a chaotic treasure hunt.Item-Specific Storage: The Tools of the Trade
Different types of decorations have different needs. Investing in a few specialized containers, or getting creative with household items, can save you a world of frustration and protect your cherished holiday treasures for years to come.Protecting Precious Ornaments
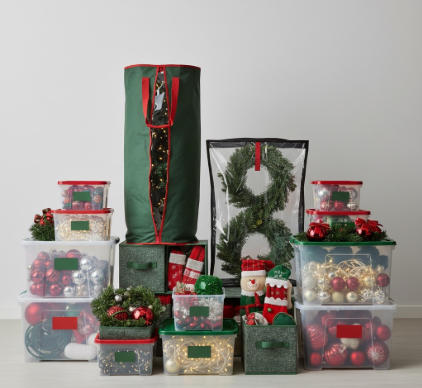
Ornaments are often the most fragile and sentimental items we own. Tossing them into a bin is a recipe for disaster. Specialized ornament storage boxes with cardboard dividers are an excellent investment. They provide individual compartments for each ornament, preventing them from knocking against each other and breaking. For a more budget-friendly approach, you can create your own system. Use egg cartons for smaller, round ornaments and plastic drink cups arranged in a bin for larger ones. For delicate, heirloom-quality pieces, always wrap them individually in acid-free tissue paper before placing them in their compartment.Conquering the Tangled Mess of Lights
Untangling a massive knot of Christmas lights can test the patience of a saint. To avoid this annual nightmare, never, ever just bunch them up and throw them in a box. The simplest DIY solution is to wrap them around a sturdy piece of cardboard, cutting a slit on each end to secure the plugs. Empty Pringles cans or coffee cans also work wonderfully as spools. For those with extensive light displays, consider purchasing dedicated light reels or spools. They make both winding and unwinding a breeze and often come with their own storage bags. No matter the method, the goal is the same: ensure the lights come out next year as easily as they went in.Pay close attention to where you store your decorations. Attics and garages are common choices, but they often experience extreme temperature fluctuations and humidity. These conditions can cause plastic to become brittle, colors to fade, and can encourage the growth of mold and mildew on fabrics and cardboard. A cool, dry, and dark location like a basement, closet, or climate-controlled storage unit is always the safest bet for preserving your holiday decor.


